How to Build a Workbench for Your Airsoft Man Cave:
Sup Airsoft Playas? Today I'ma show y'all how to build a workbench for working on your Airsoft guns out in your Man Cave. Oh, you don't have a Man Cave? Well, you best get one right quick. They are crucial for your sanity when you share your house with other humans.
Tools needed for this project:
Wood
Wood Screws, or Drywall Screws
Tools
Brain
Apple Rings Candy
Vitamin Water XXX flavor
Just kidding, I'll get more specific.
But before I do that I would like to point out that this was essentially my first official woodworking project in my entire life that I physically built completely on my own. I had to seek the professional guidance of three different individuals during the planning phase, otherwise this project would have probably never gotten off the ground, and even if did, it would have likely gone to Hell in a handbasket. So a special thanks goes out to my wonderful father, my good friend, Airsoft teammate & expert "woodworkerist," Ben Holley, of Lighting Resources in Clovis, CA, and lastly, to my mother-in-law, who is actually quite experienced in these types of personal home projects, plus she's a Marine (honorably discharged) so watch your mouth.
Soooo...since I'm not an expert here, you're going to see some "discrepancies" in my methods and execution and consequently desire to troll me for it, but unless you'd like to offer constructive criticism on ways to do this better, I probably won't be approving your comments for posting. Just sayin'.
For this project, I used:
- Two (2) 4'x8' sheets of big-ass plywood for my table top surfaces. I used two of those beasts because I wanted a workbench made for a beast. Yup.
However, this tutorial will also apply to more reasonably sized workbenches as well.
- 8 foot 2"x4" sticks, quantity of about 16 or so. Probably more than I needed. This stuff was used to frame the table tops and to provide bracing for the legs.
- 8 foot 4"x4" sticks, quantity of three. For the table legs.
- Three 6" long, 5/8" diameter lag bolts to attach my two table tops together to form a big "L" shape. Don't forget the corresponding washers and nuts to go with these guys.
- Box of 3" drywall screws (aka wood screws)
- Box of 2" drywall screws
- Tape measure
- Pencil for marking measurements
- I had to use a hand-held circular SAW to cut the 2x4s & 4x4s because it was all I had at the time, but a Mitre saw would be a much better choice. That circular saw made it tough to make clean cuts on the wood without making clean cuts in my flesh. Exercise caution when using saws. I hear they can cut through bone.
- Black & Decker FireStorm cordless power drill - This thing is a torque-boss. I didn't have any other option for a drill either and was skeptical whether or not it would have enough balls to drive those 3" screws all the way into the wood, but the FireStorm pwned those screws. Pwned 'em hard.
- 3M Peltor Hearing protection for working with the circular saw. That thing gets really loud and even louder when you start cutting the wood.
- Apple Rings chewy candy. Cuz it was right by the checkout stand at the hardware store. (See photo up top)
- Vitamin Water XXX Flavor. Also right by the checkout stand. Also delicious.
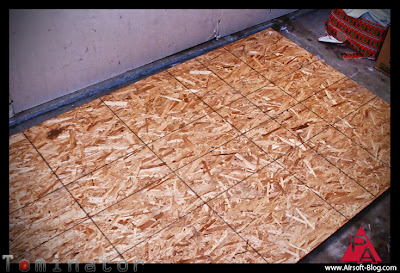
First step that I took. Framing the big table top. Framing, I learned is pretty handy for creating a super sturdy, super beast, Airsoft workbench. It will allow you to place a lot of weight on that table and not have to lose any sleep over the table breaking. So start with your blank sheet of plywood.
I chose to add the long-side rails first since both the plywood and the 2x4s were already cut in 8-foot lengths. So I just attached them with the 2-inch screws from the top of the table. I spread the screws out about 8" apart from each other going down the line.
Pictured below is a view of the bottom side of the table, with the two 8' 2x4s mounted. Some of you might notice that I didn't place the top 2x4 flush with the edge of the plywood.
That's because I wanted to add a reinforced lip to the front of the tabletop so that I could attach things like vices & stuff that need to be able to clamp down on the side of the table. Some of the stuff I have doesn't open more than 4 inches, so I couldn't just use the framed edge. So to reinforce the lip, I just added a third 2x4 in the 8-foot length and just laid it flat, using the 2" wood screws again, spaced 8" apart, driven through the top of the table (the side opposite to the one visible in the photo below).
Here's a shot from different POV so that you can see that I also attached the frame to the lip reinforcement to help keep that lip solid. Whether or not this was necessary is unknown to me because I'm not a master woodsmith. But at the time it made sense and I was having fun driving those screws in with my cordless power drill, so I said, "What the hell? Why not?"
Not the greatest shot, but if you look closely, you can see the two screws (black dots) where I attached the inner frame bars to the side rails.
Here's what the frame looks like without the plywood tabletop attached. I spaced the short 2x4s about 13 inches apart, measuring from the center of each piece.
Here it is finished, standing on its side. 8 feet, my friends. My camera lens wasn't actually wide enough to get the whole thing in frame, but you get the idea.
So obviously, while the tabletop is finished, it's only one of the two that I made and it also needs the legs and bracing. But we'll get to that next week.
If you'd like to build your own workbench for working on your Airsoft guns, but you don't have a big enough room for 64 square feet of workbench space, fret not. This model can be scaled down, if you didn't already come to that realization. Total cost for all the wood & materials was mind-blowingly cheaper than I expect. I think the total for everything only came out to roughly about $70. Those 2x4s are only like 2 bucks a piece and the plywood might have only been about $15 or so. So pretty reasonable for a massive setup like this. So stay tuned for the next installment.

 |
| How to Build a Workbench for Your Airsoft Man Cave Tom Harris for the Pyramyd Airsoft Blog |
Tools needed for this project:
Wood
Wood Screws, or Drywall Screws
Tools
Brain
Apple Rings Candy
Vitamin Water XXX flavor
Just kidding, I'll get more specific.
But before I do that I would like to point out that this was essentially my first official woodworking project in my entire life that I physically built completely on my own. I had to seek the professional guidance of three different individuals during the planning phase, otherwise this project would have probably never gotten off the ground, and even if did, it would have likely gone to Hell in a handbasket. So a special thanks goes out to my wonderful father, my good friend, Airsoft teammate & expert "woodworkerist," Ben Holley, of Lighting Resources in Clovis, CA, and lastly, to my mother-in-law, who is actually quite experienced in these types of personal home projects, plus she's a Marine (honorably discharged) so watch your mouth.
Soooo...since I'm not an expert here, you're going to see some "discrepancies" in my methods and execution and consequently desire to troll me for it, but unless you'd like to offer constructive criticism on ways to do this better, I probably won't be approving your comments for posting. Just sayin'.
For this project, I used:
- Two (2) 4'x8' sheets of big-ass plywood for my table top surfaces. I used two of those beasts because I wanted a workbench made for a beast. Yup.
64 SQUARE FEET OF WORKSPACE for bossin' it hard.
However, this tutorial will also apply to more reasonably sized workbenches as well.
- 8 foot 2"x4" sticks, quantity of about 16 or so. Probably more than I needed. This stuff was used to frame the table tops and to provide bracing for the legs.
- 8 foot 4"x4" sticks, quantity of three. For the table legs.
- Three 6" long, 5/8" diameter lag bolts to attach my two table tops together to form a big "L" shape. Don't forget the corresponding washers and nuts to go with these guys.
- Box of 3" drywall screws (aka wood screws)
- Box of 2" drywall screws
- Tape measure
- Pencil for marking measurements
- I had to use a hand-held circular SAW to cut the 2x4s & 4x4s because it was all I had at the time, but a Mitre saw would be a much better choice. That circular saw made it tough to make clean cuts on the wood without making clean cuts in my flesh. Exercise caution when using saws. I hear they can cut through bone.
- Black & Decker FireStorm cordless power drill - This thing is a torque-boss. I didn't have any other option for a drill either and was skeptical whether or not it would have enough balls to drive those 3" screws all the way into the wood, but the FireStorm pwned those screws. Pwned 'em hard.
- 3M Peltor Hearing protection for working with the circular saw. That thing gets really loud and even louder when you start cutting the wood.
- Apple Rings chewy candy. Cuz it was right by the checkout stand at the hardware store. (See photo up top)
- Vitamin Water XXX Flavor. Also right by the checkout stand. Also delicious.
First step that I took. Framing the big table top. Framing, I learned is pretty handy for creating a super sturdy, super beast, Airsoft workbench. It will allow you to place a lot of weight on that table and not have to lose any sleep over the table breaking. So start with your blank sheet of plywood.
 |
| How to Build a Workbench for Your Airsoft Man Cave Tom Harris for the Pyramyd Airsoft Blog |
Pictured below is a view of the bottom side of the table, with the two 8' 2x4s mounted. Some of you might notice that I didn't place the top 2x4 flush with the edge of the plywood.
 |
| How to Build a Workbench for Your Airsoft Man Cave Tom Harris for the Pyramyd Airsoft Blog |
 |
| How to Build a Workbench for Your Airsoft Man Cave Tom Harris for the Pyramyd Airsoft Blog |
 |
| How to Build a Workbench for Your Airsoft Man Cave Tom Harris for the Pyramyd Airsoft Blog |
 |
| How to Build a Workbench for Your Airsoft Man Cave Tom Harris for the Pyramyd Airsoft Blog |
Here's what the frame looks like without the plywood tabletop attached. I spaced the short 2x4s about 13 inches apart, measuring from the center of each piece.
 |
| How to Build a Workbench for Your Airsoft Man Cave Tom Harris for the Pyramyd Airsoft Blog |
Here it is finished, standing on its side. 8 feet, my friends. My camera lens wasn't actually wide enough to get the whole thing in frame, but you get the idea.
 |
| How to Build a Workbench for Your Airsoft Man Cave Tom Harris for the Pyramyd Airsoft Blog |
If you'd like to build your own workbench for working on your Airsoft guns, but you don't have a big enough room for 64 square feet of workbench space, fret not. This model can be scaled down, if you didn't already come to that realization. Total cost for all the wood & materials was mind-blowingly cheaper than I expect. I think the total for everything only came out to roughly about $70. Those 2x4s are only like 2 bucks a piece and the plywood might have only been about $15 or so. So pretty reasonable for a massive setup like this. So stay tuned for the next installment.
Sem comentários:
Enviar um comentário